Revive history trend for allure reports in GitLabCI with cypress.io tests
Allure Report is an easy-to-configure, popular reporting tool with many test frameworks. It can also be used with almost all popular CI/CD pipelines, including GitLab. Development teams often configure their GitLab CI/CD testing stage with Allure Report. Unfortunately, they don’t enable its full power.
They are usually satisfied with generating the report and ignore that some key features are unavailable. The missed features in this typical approach are as follows:
- test result trend chart with navigation to the previous build
- single test history
- automated test flakiness marking
- execution time trend
Activating these missed features in GitLab CI needs some additional work. For supporting missed features, data from allure-report/history folder need to be copied to the new pipeline before the new report is generated. In complex pipelines, there are many pipelines, and only some of them generate reports. Consequently, it is hard to point out whether the source pipeline has the necessary data. A simpler solution is transferring necessary data from the pipeline to some persistent storage as AWS S3. This paper will describe this approach on an example of a default Cypress tests project, which comes with cypress installation. Cypress is a handy example only. In the presented approach, the next parts can be reused for other test frameworks with Allure.
Initial configuration
Let’s start project configuration by using the following commands:
Initial configuration for JS project with Cypress
After that, Cypress studio will open, and you can check if default Cypress tests are working as expected.

Cypress studio with sample tests
The Allure plugin for Cypress used in this example comes from https://github.com/Shelex/cypress-allure-plugin. It has a nice and clear configuration description. However, besides the plugin for the HTML report, when generating, you will also need Java installed in your Docker image or in the pipeline. Once the plugin is configured, please update your cypress.json file as described below:
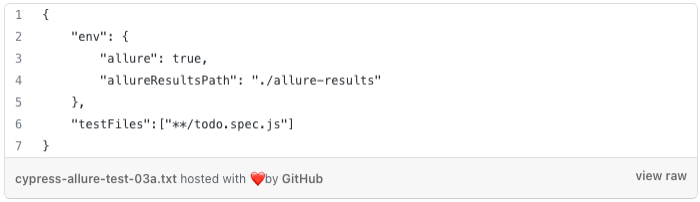
Updates in cypress.json file
Test scope was reduced to only one spec file so that pipeline duration and GitLab CI runners resources utilisation will be reduced. For convenient test starting, report generating, and report cleaning scripts in package.json file were created as presented on the listing below.
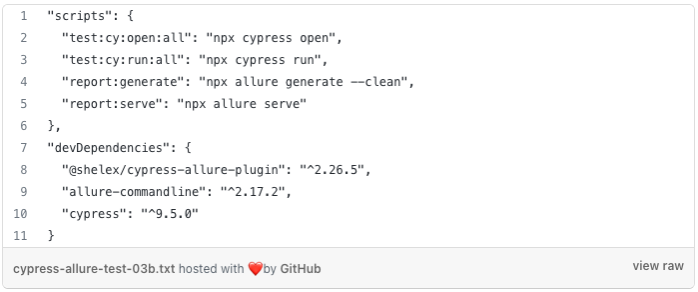
New scripts and packages in package.json file
After these configuration steps, please run npm install again and next run the test using newly defined scripts. Once you run a series of commands:

The command sequence for running tests and generating a report
you will see the following report in your default browser.
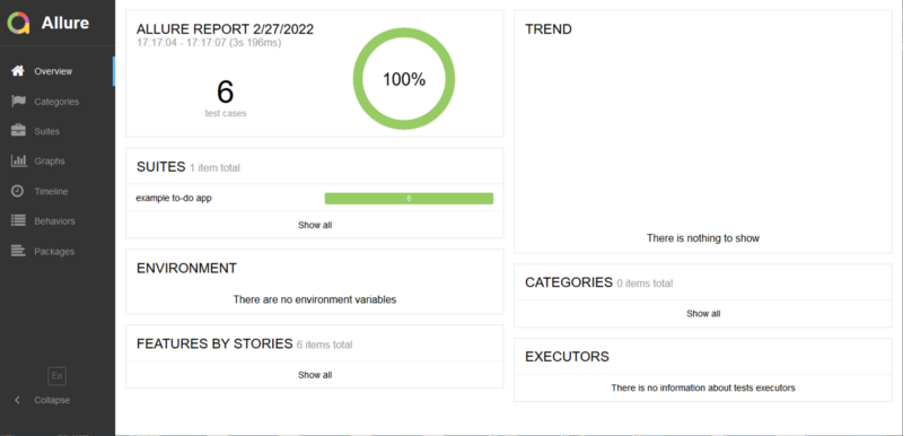
Allure report from preliminary local tests
Now, tests and basic local reporting are configured. Let’s create GitLab repository with a simple pipeline and connect our local code with the repo by following the instructions provided by GitLab.
GitLab CI configuration
In the next step, the default gitlab-ci.yml file needs to be adopted to our concept. It will use the base docker image provided by the cypress team and pipeline code based on cypress team recommendations. The pipeline code that runs Cypress tests and generates Allure test results as GitLab artefacts look as follows.
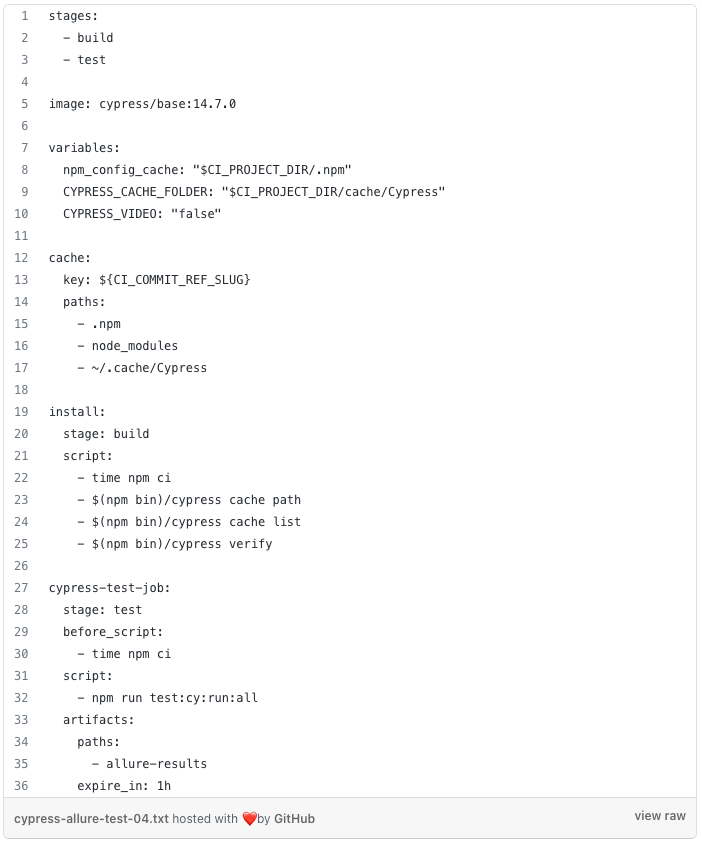
Pipeline code for running test in Gitlab CI
Using this code, the GitLab pipeline produces Allure test results (data for report) which we can find under the Browse button:
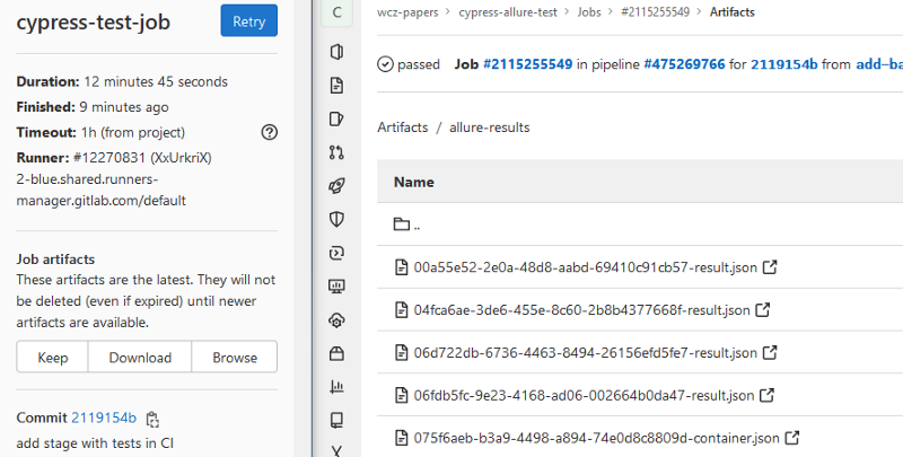
GiltabCI artefact’s buttons and view on allure-results directory
Allure needs Java for report generating. We can either build a custom docker image with node.js, cypress and Java or use the current one and install the necessary tools. For this example, I decided to use the same image as for test and installing Java and AWS CLI in the pipeline by additional script. For professional use, a custom Docker image is a better option.
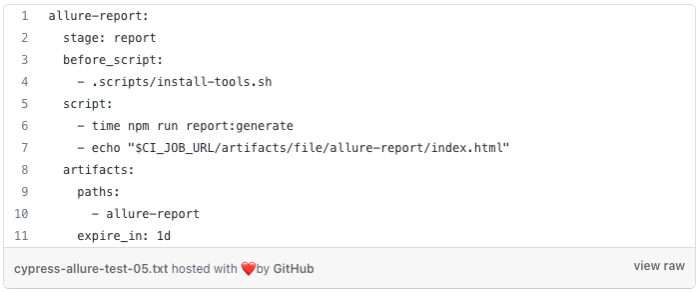
Job for creating Allure report
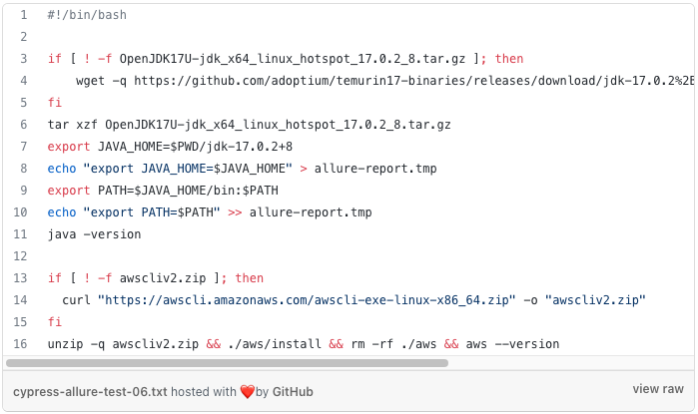
Script for tools installation
History support
When the pipeline has finished, we obtained the same reports that we got in the previous example, but now produced by GitLabCI. To enable history in the pipeline, we need to implement the steps as follows:
- download allure-report/history directory with all files from the previous step store in the AWS S3 bucket
- move this report to the empty allure results directory
- generate report
- upload allure-report/history directory with all files to the AWS S3 bucket.
As a result, we will get a report with the historical trend. In this report, each historical run leads to a previously generated report. It allows us to navigate through history limited only by artefact expiration settings of the oldest report.
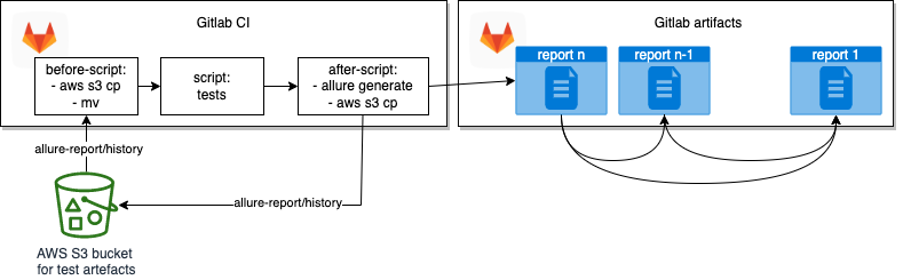
Diagram of report history support
To enable this option, we need to create an S3 bucket, add permissions and update the pipeline. For this example, S3 bucket was created with default options and permissions based on the custom bucket policy. AWS CLI cp command will be used to transfer history between the pipeline and the cloud.
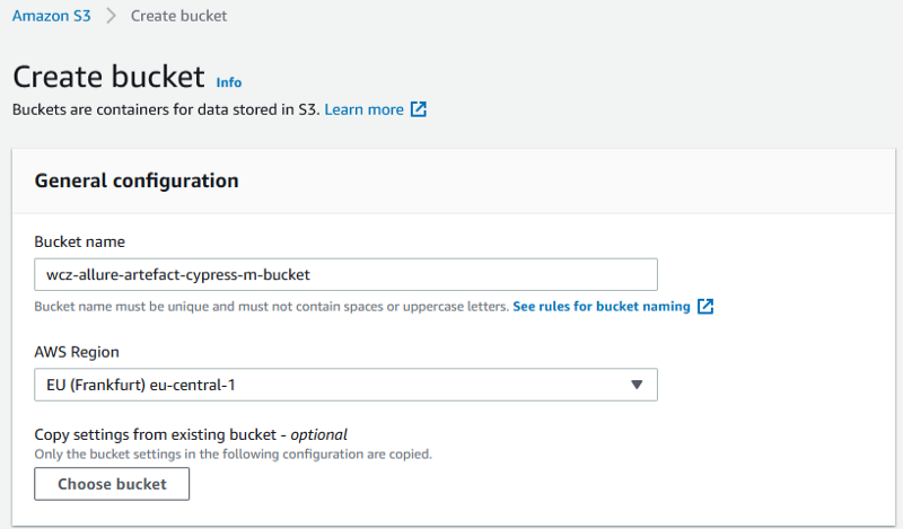
AWS console for new S3 bucket creation
Before the report is generated, the allure report history folder from the previous run must be downloaded from the S3 bucket to the job and put in the allure-results folder. It is also crucial that history separation for branches and test suites is ensured. For this reason, the archive name stored in the environment variable REPORT_HISTORY_SLUG, must be built dynamically. In this case, this variable is composed of constant prefix, branch name and suite name and will produce history artefacts separately for each suite on each branch, as presented in the picture below.
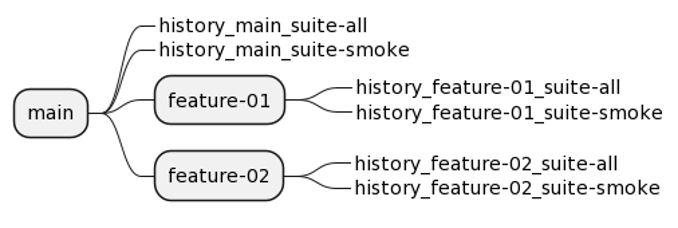
Branch and suite artefact separation idea
Also, REPORT_HISTORY_SLUG must fulfil tar and bucket naming limitations; in this case, some forbidden characters were replaced by the sed command.
If a report for a new branch does not exist or was removed from the bucket, the history from main branch will be taken (REPORT_HISTORY_SLUG_MAIN variable). Environment variables created in this script are saved to the file allure-report.tmp and injected into the subsequent scripts’ environment.
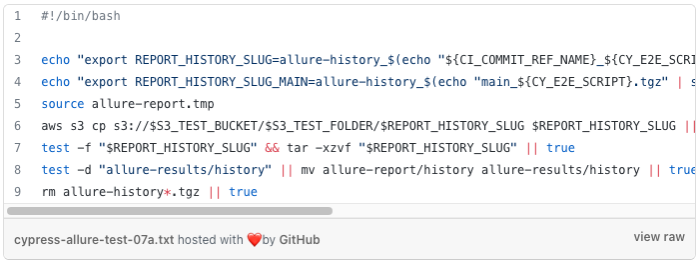
Script for downloading artefacts from previous before generating report
After every report generation, allure-report/history directory will be consolidated and compressed as .tgz archive and copied to the S3 bucket. It replaces the previous archive for the current branch and suite combination.
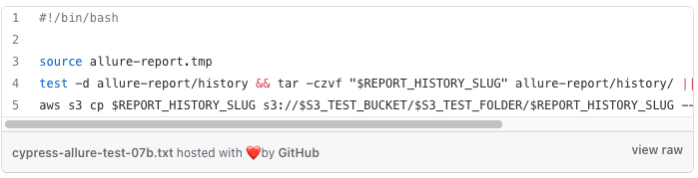
Compressing and sending allure history data to S3 bucket
New scripts and data necessary for communication with the bucket were added to the pipeline code. Job scoped variables S3_TEST_BUCKET and S3_TEST_FOLDER were defined for storing S3 bucket and folder name.
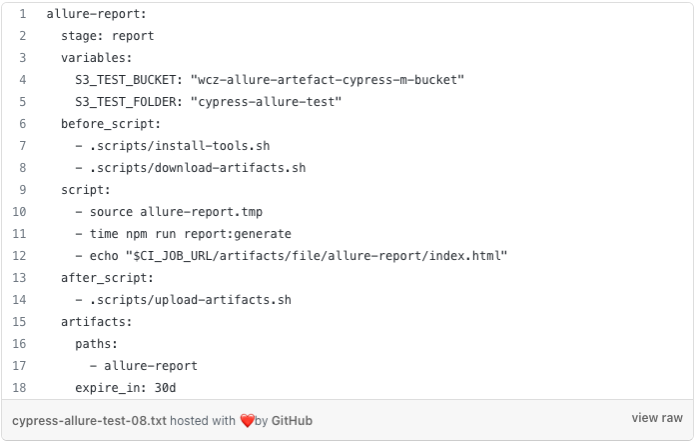
Updated pipeline job for supporting allure reports with history
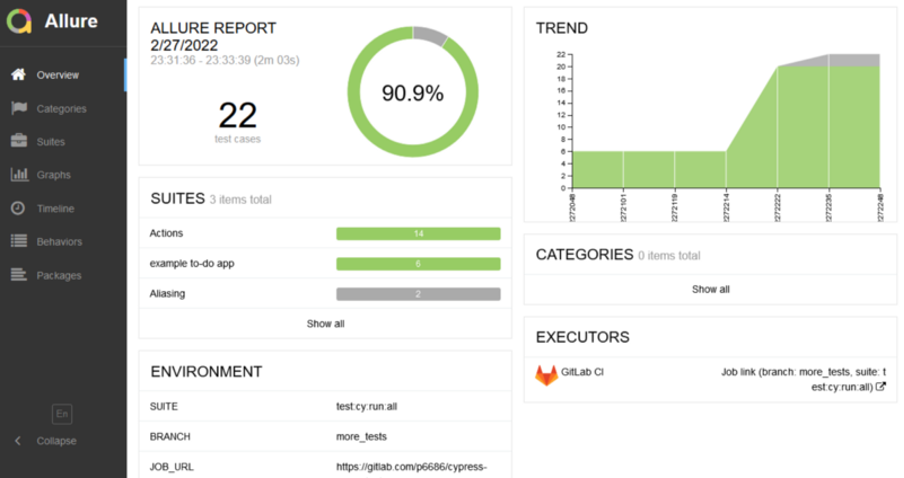
At this stage, after two pipeline runs, we obtain a report with the trend chart activated. Unfortunately, navigation by clicking on the trend chart doesn’t work.
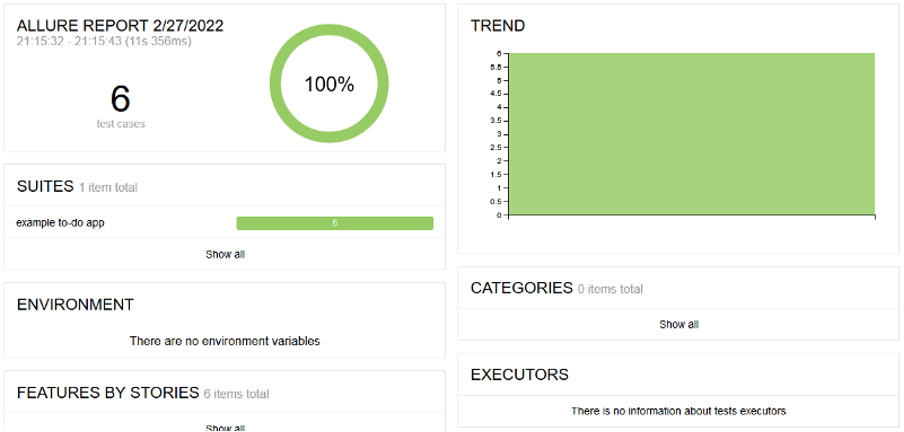
Allure report with an active history
The last steps to having a fully working report with history navigation is creating executor.json file and adding info about each job build and environment data. It can be done by the next shell script allure-env.sh presented below. The script must be added at the end of before_script section.
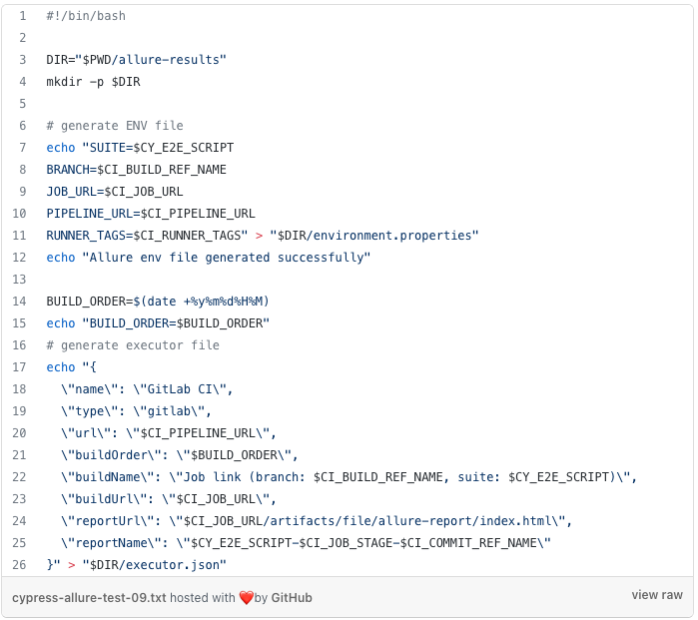
Script for adding data to environment and executor sections in the report
Finally, a report with active history and environment data has been created. More tests were added, some were skipped. The environment section shows some test parameters such as suite name and branch name. The executor section link will move you to the job log. Regarding the trend section, if you click on one of the previous builds on trend charts, you will be redirected to one of the earlier reports, which also has active trend charts and allows next-back navigation.
Report after next runs and adding passing and skipped tests
When we look at the S3 bucket, as seen in the picture below, artefacts for three branches were created. Artefacts for existing and used branches will be updated by pipeline, artefacts for old branches will stay and should be removed manually or even better by setting relevant S3 object’s lifecycle rules.
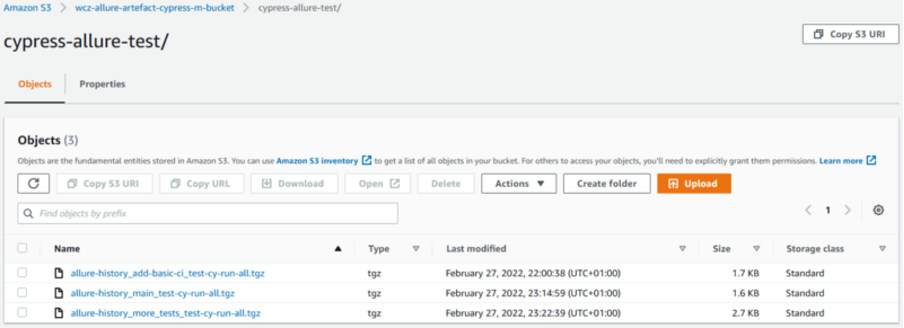
Sample compressed allure-history data stored in the S3 bucket
Conclusion
By following the steps presented in this article, you will be able to activate useful allure report’s features. Test history trends are visible; the trend chart allows you to jump in a selected build just by clicking on it. After such a jump, all test data for old test execution can be reviewed, as well as next jumps to other builds being made possible. Links to log in GitLab CI console are available by a link in the executor section, detailed data about test execution settings and environment are visible in the environment section.
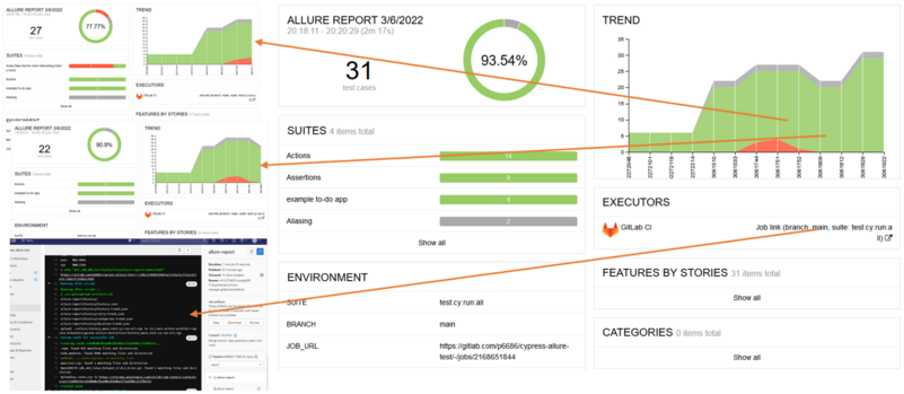
Jumping to historical reports and pipeline logs
Additionally, time duration, duration histogram and retries trends were available for many runs. These data are useful for test stability and performance purposes. Also, flakiness detection starts working when historical data are available.
References
- Cypress documentation
- Allure plug-in for Cypress
- Cypress docker images
- AWS CLI documentation
- Generating Allure Trendline on Gitlab Pages
Wojciech Czyżycki, Grand Parade
See more news

Design It! From Business Requirements to System Design
Creating a clean software architecture should consider the solution complexity. Sometimes, the system, which at first glance seems to be simple, in fact, is not. On the other hand, those which seem too complex to visualize could be easy to understand. The best approach to fully understand this process is to prepare a system design. What does it mean to create a proper design? Read the article penned by Dawid Cisowski, Senior Software Engineer at Grand Parade.
Read more
InnerSource – how to implement it?
InnerSource adopts OpenSource practices to code that remains proprietary and can only be seen within one organization or a small set of collaborating organizations. This approach helps reduce dependencies between development teams, break silos and remove bottlenecks, as well as increases knowledge-sharing within the company.
Read more